linux中安装nodejs,卸载nodejs,更新nodejs,git,linux中安装nginx并配置
本文共 4405 字,大约阅读时间需要 14 分钟。
文章目录
注意,我的是Ubuntu系统
node的安装与卸载(更新版本)
卸载nodejs
卸载node
sudo apt-get remove nodejs
清理掉自动安装的并且不需要软件包
sudo apt autoremove
查看node相关的文件
sudo whereis node
如果有文件需要手动删除文件
删除该文件命令sudo rm -rf /usr/local/bin/node
在此查看node -v 是未找到,说明你已经卸载掉了
安装新版本node
更新能软件库
sudo apt-get update
安装curl
sudo apt install curl
从NodeSource获取最新稳定版的Node.js版本:
注意:想安装17,把下面的18换成17,下载的是17的最新版,curl -fsSL https://deb.nodesource.com/setup_18.x | sudo -E bash -
安装nodejs
sudo apt install -y nodejs
查看
node -v
git安装与拉取代码
安装
sudo apt install git
git --version
解决 linux git 每次推拉(push/pull)代码都要输入用户名密码的问题
执行命令前先执行下面命令
git config --global credential.helper store
然后 git pull 输入账号 输入密码 下次在拉取代码的时候就不用密码了

或者用公钥


下面的这种全局配置命令没有用,谁能告诉我
git config --global user.name "username"git config --global user.email "username@mail.com"
nginx 安装、配置和卸载
逐步介绍如何在 Ubuntu 22.04 LTS 上安装 Nginx Web 服务器
安装、启动
windows中
需要在nginx的安装目录下的终端去执行以下命令
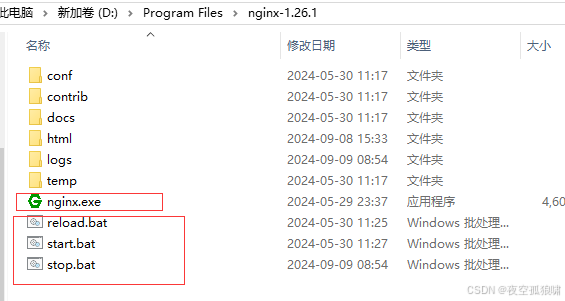
// nginx 配置重启nginx -s reload// nginx 配置启动start nginx// nginx 配置停止nginx -s stoptaskkill /f /t /im nginx.exe
ubuntu中
sudo apt updatesudo apt install nginx -y
启动并启用 Nginx 服务
sudo systemctl start nginx
开机自动启用 Nginx 服务(如果这一步报错,先跳过去,不影响,只是不能开机自启动了)
sudo systemctl enable nginx
验证 Nginx 服务状态
sudo systemctl status nginxsudo systemctl is-active nginx
重启 Nginx 服务
nginx -s reload
或者使用下面的命令重启
sudo systemctl restart nginx
出现下图,证明你成功了,直接在浏览器输入IP地址就会看到 Welcome to nginx!几个大字。
注意默认端口号是80,
 记得在这里打开对应的端口号,并重启 如果你没有看到那个 welcome to nginx! 就使用nginx -t查看报错信息 如果显示成功,就别用80端口号,(有些云服务器在没有备案成功之前,80端口是不能用的,将默认端口号更改为其他的端口号华为云,天翼云都需要先备份)

nginx配置
安装完成,先不用动任何东西,先找nginx文件安装路径:/etc/nginx
 在**/etc/nginx/sites-enabled**目录下你会发现一个default文件,其他都不要动,自己写一个 **.conf文件放到这个目录下即可
**.conf 文件内容
最简单的配置,注意前端包路径

这个图是纠正下图有个错误的地方(同一端口号不同项目),这个图是正确的


server { listen 80; server_name demo.com; location / { root /html/jianda; index index.html; } location /second { alias /html/jianda2; index index.html; } } server { listen 8080; server_name demo.com; location / { root /second/dist; index index.html; } } server { listen 8088; server_name demo.com; location /prod-api/ { client_max_body_size 200m; proxy_pass http://localhost:3000/; proxy_cookie_domain ~.* $host; #proxy_set_header Host $http_host; proxy_pass_header Set-Cookie; proxy_set_header Host $host; proxy_http_version 1.1; proxy_set_header X-Real-IP $remote_addr; proxy_set_header REMOTE-HOST $remote_addr; proxy_set_header X-Forwarded-For $proxy_add_x_forwarded_for; proxy_redirect off; } location /prod-api/ { proxy_pass http://localhost:5102/; } location / { root /html/jianda; try_files $uri $uri/ /index.html; index index.html; } } nginx 卸载
# 删除除了配置文件以外的所有文件。sudo apt-get remove nginx nginx-common# 删除所有与nginx有关的东西,包括配置文件。 sudo apt-get purge nginx nginx-common # 在上面命令结束后执行,主要是删除与Nginx有关的且不再被使用的依赖包。sudo apt-get autoremove # 删除两个主要的包。sudo apt-get remove nginx-full nginx-common
安装mysql
1、安装
sudo apt install mysql-server
2、安装完查看mysql启动状态:
systemctl status mysql

a、 sudo mysql -uroot 回车直接登录 b、修改密码:alter user 'root'@'localhost' identified with mysql_native_password by '这里是密码'; c、执行:flush privileges;使密码生效,然后使用root用户登录。
重置mysql中root用户密码:
用默认账号密码去登录,让后去修改密码如果登入用户错:Enter password: ERROR 1698 (28000): Access denied for user 'root'@'localhost' 需要重置root用户密码: 先查看获取默认用户: sudo vim /etc/mysql/debian.cnf 找到: 用户名:user = debian-sys-maint 密码:password = ecMdhCUfmsLmyGOq 用默认用户登录:
修改密码:alter user root@localhost identified with mysql_native_password by '这里是密码'; 修改成功字样:Query OK, 0 rows affected (0.01 sec) 执行:flush privileges;使密码生效,然后使用root用户登录。
创建自己的用户:
create user '用户名'@'%' identified with mysql_native_password by '密码';
mysql 简单操作
都安装mysql了,肯定要用,简单的操作也写一下
连接mysql 连接MySQL服务器的话,则:mysql -u root -p (注意:我的用户名是root),然后输入密码就可以再次连接了 显示数据库
show databases;
显示数据库中的表
使用某个库
use 库名;
//注意先使用use 库名show tables;
在库中导入sql文件
mysql -u root -p123456 --database login < login.sql// mysql -r 数据库账号 -p数据库密码 --库名 需要导入的表名 < 将要导入的sql文件
转载地址:http://tszfk.baihongyu.com/
你可能感兴趣的文章
Mysql中视图的使用以及常见运算符的使用示例和优先级
查看>>
Mysql中触发器的使用示例
查看>>
Mysql中设置只允许指定ip能连接访问(可视化工具的方式)
查看>>
mysql中还有窗口函数?这是什么东西?
查看>>
mysql中间件
查看>>
MYSQL中频繁的乱码问题终极解决
查看>>
MySQL为Null会导致5个问题,个个致命!
查看>>
MySQL为什么不建议使用delete删除数据?
查看>>
MySQL主从、环境搭建、主从配制
查看>>
Mysql主从不同步
查看>>
mysql主从同步及清除信息
查看>>
MySQL主从同步相关-主从多久的延迟?
查看>>
mysql主从同步配置方法和原理
查看>>
mysql主从复制 master和slave配置的参数大全
查看>>
MySQL主从复制几个重要的启动选项
查看>>
MySQL主从复制及排错
查看>>
mysql主从复制及故障修复
查看>>
MySQL主从复制的原理和实践操作
查看>>
webpack loader配置全流程详解
查看>>
mysql主从复制,读写分离,半同步复制实现
查看>>